If you’ve encountered the “DNS Not Responding” error, you are not alone! Many WordPress users face his issue.
Thankfully, resolving it is usually quite simple if you follow a few key troubleshooting steps. Sometimes, a quick check of your internet connection can do the trick, while in other cases, adjusting your DNS server settings or clearing the DNS cache might be necessary.
In this post, we’ll break down what causes the DNS Server Not Responding error and walk you through five practical methods to resolve it.
Ready? Let’s dive in!
DNS Not Responding Error —Brief Intro
Unlike White Screen of Death in WordPress the DNS Server Is Not Responding error frequently occurs in WordPress, although it can also impact access to non-WordPress sites. This error is especially frustrating because it prevents you from reaching your site, often displaying a message like “This site can’t be reached.”
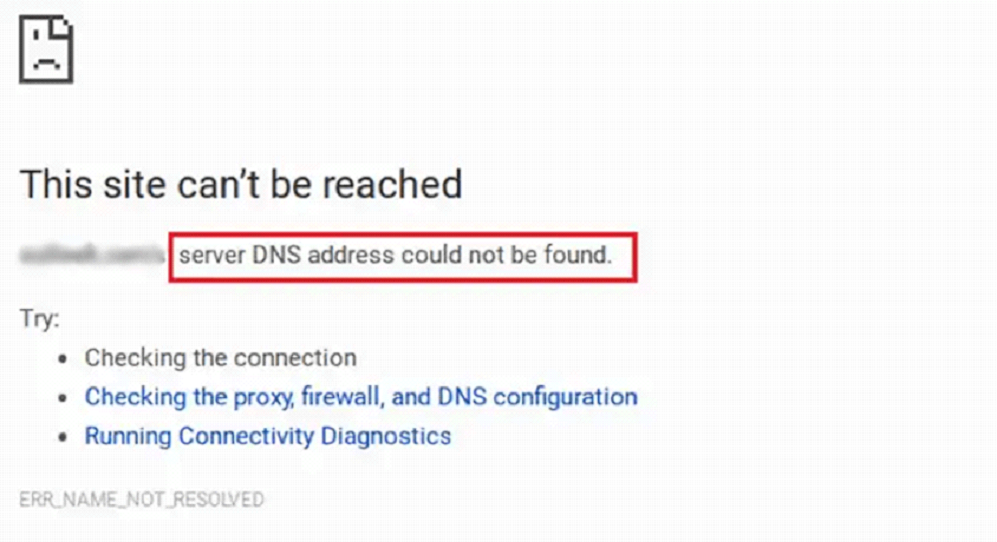
When this error appears, it signals that your web browser is struggling to connect with the DNS server for the site you’re trying to visit. This can happen if the DNS server is down or if your browser isn’t connected to the internet.
DNS plays a crucial role in linking your browser to the server of the website. If your browser can’t reach the DNS server, the website won’t load, creating a barrier to site access.
What Causes DNS Not Responding Error?
Several factors can affect your browser’s connection with the DNS server, leading to the DNS Server Not Responding error, such as:
- Missing or incorrect DNS records: If your DNS cache is outdated, your browser might struggle to locate the correct IP address for the website.
- Unavailability of DNS servers: The DNS server itself may be temporarily inaccessible due to high traffic or an outage.
- Software and hardware issues: Problems like a malfunctioning router, incorrect network settings, outdated adapter drivers, or overly strict firewall software can all interfere with your network connection.
Pinpointing the exact cause of the DNS Server Is Not Responding error can be challenging. For this reason, it’s helpful to go through a series of troubleshooting steps to diagnose and resolve the issue.
In the following sections, we’ll guide you through some effective methods to fix this error in WordPress.
5 Easy Ways to Fix the DNS Not Responding Error
We now have a better understanding of the DNS Server Is Not Responding error. Here are five troubleshooting tips you can use to fix it.
- Switch to a Different Web Browser
- Restart Your PC In Safe Mode
- Fix Any Network Issues
- Disable Antivirus and Firewall
- Flush Your DNS Cache
Let’s explore them one by one.
#1: Switch to a Different Web Browser
Start with the simplest troubleshooting step: try opening your site using a different web browser. This helps identify if the issue is tied to your current browser. For example, if you usually browse with Google Chrome, switch to Mozilla Firefox, Safari, or Microsoft Edge and see if the site loads.
If the error doesn’t occur on the alternative browser, your default browser might be the root of the problem. In most cases, clearing the browser cache and updating it to the latest version can resolve such issues (i.e., ERR_CONNECTION_RESET error, Error Establishing a Database Connection). Follow these steps to update Google Chrome:
- Click the three-dot menu in the top-right corner of the browser.
- Select Help → About Google Chrome.
- If an update is available, click Update Google Chrome and complete the process.
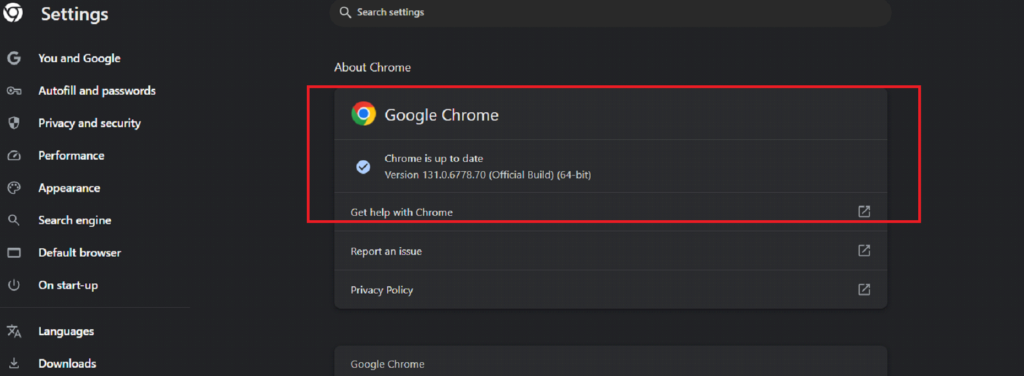
If the DNS Server Is Not Responding error continues to appear on multiple browsers, proceed to the next troubleshooting method.
#2: Restart Your PC In Safe Mode
Blocked DNS connections can sometimes result from conflicts caused by software or drivers on your device. To identify if this is the issue, restart your device in Safe Mode. This mode uses only the essential system processes and drivers, which helps isolate the problem. Follow these steps based on your device:
For Windows follow the steps below:
- On the sign-in screen, hold the Shift key and click Restart.
- Navigate to Troubleshoot → Advanced Options → Startup Settings → Restart.
- After the restart, press 5 or F5 to launch Safe Mode with Networking.
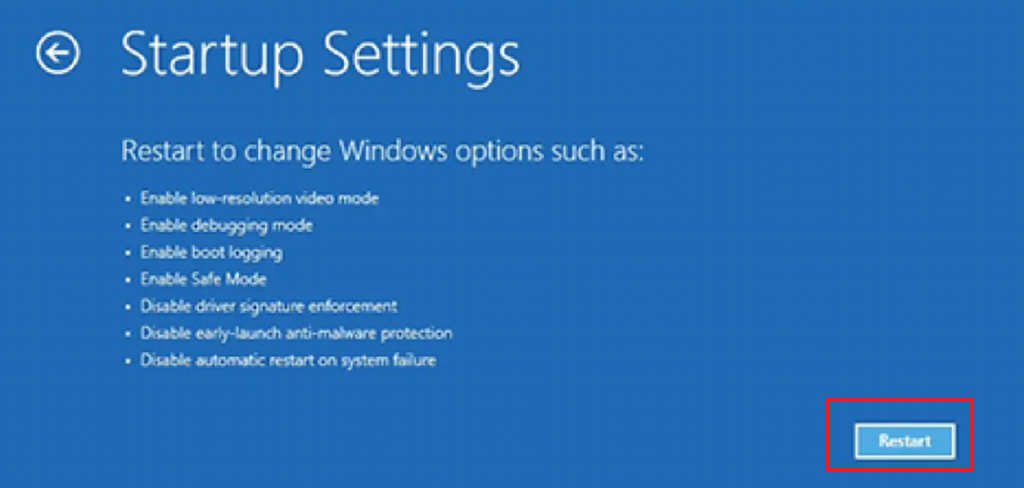
For Mac, proceed as follows:
- Press and hold the Shift key while turning on your Mac.
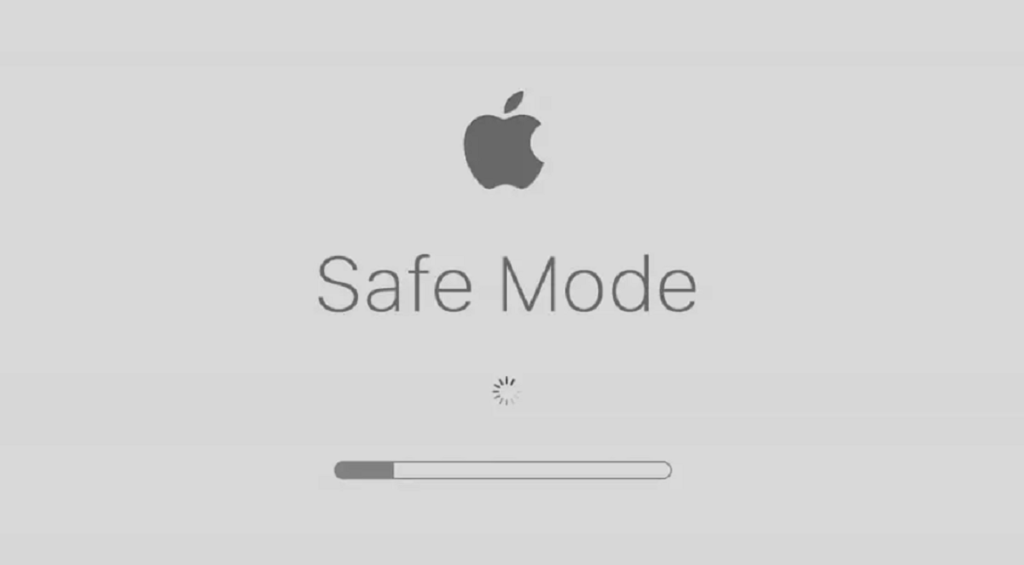
For iOS/Android:
- Press and hold the power button until the screen lights up, then tap the volume down button.
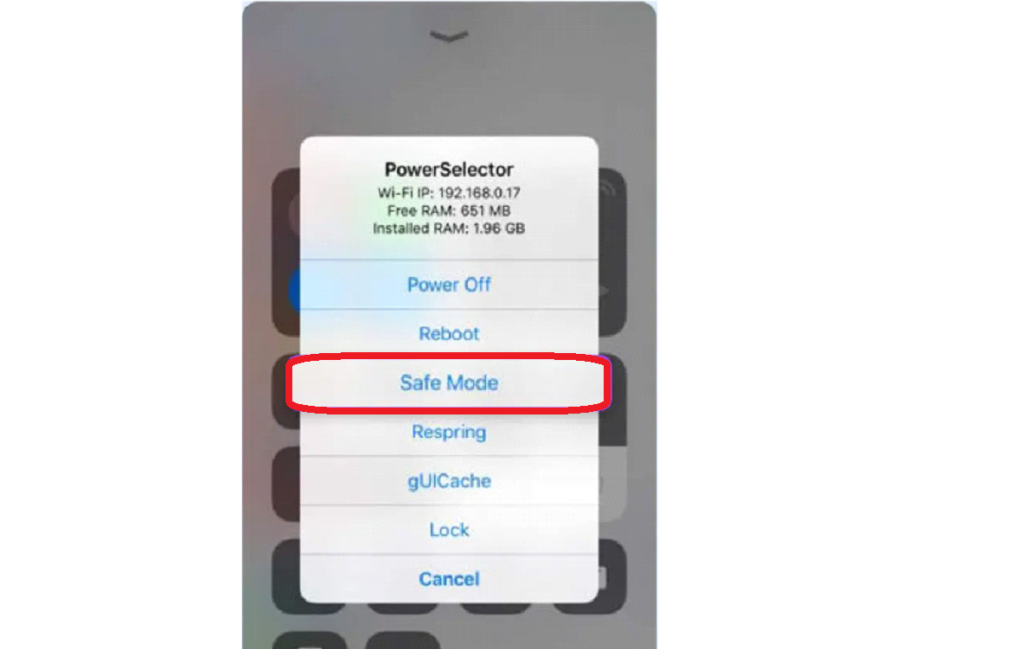
Once in Safe Mode, your device will operate with default settings and minimal drivers. Try accessing the problematic sites. If they load without errors, it indicates that third-party software or a driver is causing the DNS issues.
Although this news isn’t ideal, you can resolve the issue by testing your apps and drivers one by one. Common culprits include VPNs or security software interfering with DNS connections. Identifying and disabling the problematic application should resolve the error.
#3 Flush Your DNS Cache
Flushing your DNS cache is another effective way to resolve the DNS Server Not Responding error. Much like a browser cache, the DNS cache stores data to speed up future visits to websites by saving IP addresses instead of webpage copies. However, outdated or corrupted DNS cache entries can trigger errors, especially if you’ve recently moved your WordPress site to a new domain or switched web hosts.
To clear your DNS cache:
- On Windows:
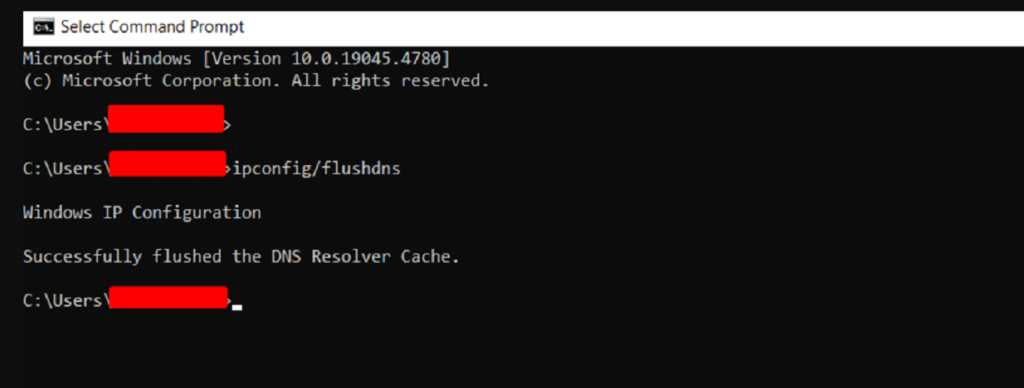
- Open Command Prompt by typing cmd in the search bar and selecting the application.
- In the Command Prompt window, type: ipconfig /flushdns and press Enter.
- You’ll receive a confirmation message stating that the DNS Resolver Cache has been successfully flushed.
- On macOS:
- Open Terminal by pressing F4, typing “Terminal” in the search bar, and launching it.
- Run the appropriate command for your macOS version. For example, if you’re using macOS Big Sur, type the following command :
sudo dscacheutil -flushcache; sudo killall -HUP mDNSResponder
- Enter your administrator password when prompted and press Enter to execute the command.

Clearing your DNS cache refreshes the connection, which should resolve the error. Once done, try accessing your website again to see if the issue is fixed.
#4: Fix Any Network Issues
DNS errors often stem from network connectivity issues, so it’s worth checking if your internet connection is causing the problem. Try switching to another network to see if the error persists. For example, if you’re getting the DNS error while connected to Wi-Fi, try using mobile data. If the site loads without issue, the problem likely lies with your Wi-Fi connection.
To troubleshoot network issues, run diagnostics on your device:
- For Windows:
- Connect to the network where you’re experiencing problems.
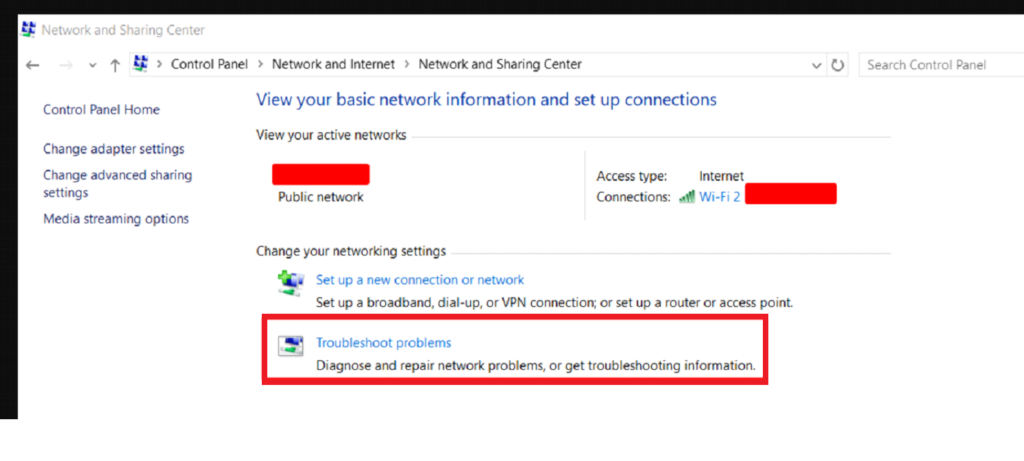
- Go to Control Panel → Network and Internet → Network and Sharing Center.
- Under Change your networking settings, select Troubleshoot problems.
- Go to Additional troubleshooters → Internet Connections and click Run the troubleshooter.
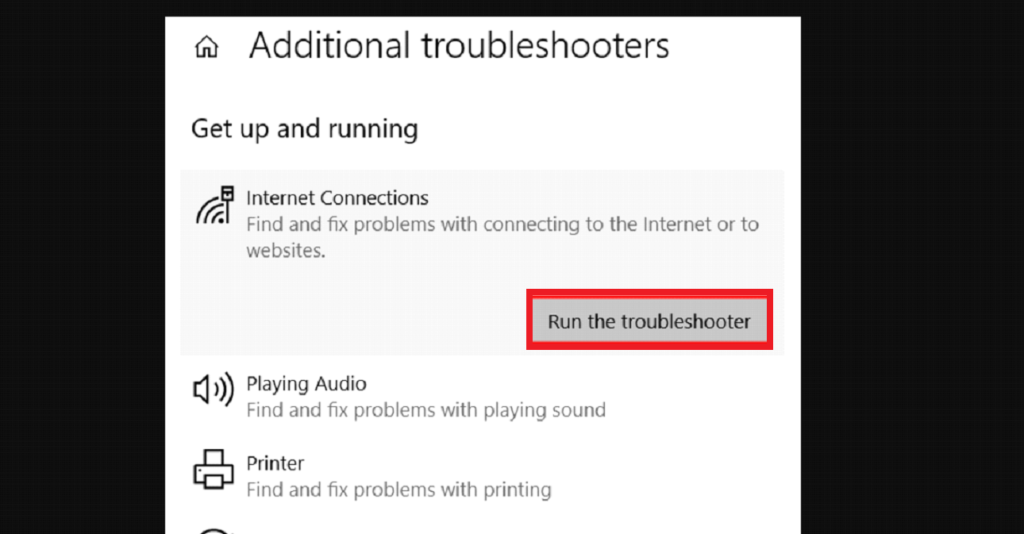
- Follow the on-screen instructions to complete the process and resolve any detected issues.
- For macOS:
- Connect to the problematic network.
- Hold the Option key and click the Wi-Fi status icon in the menu bar.
- Select Open Wireless Diagnostics and follow the steps to analyze your connection.
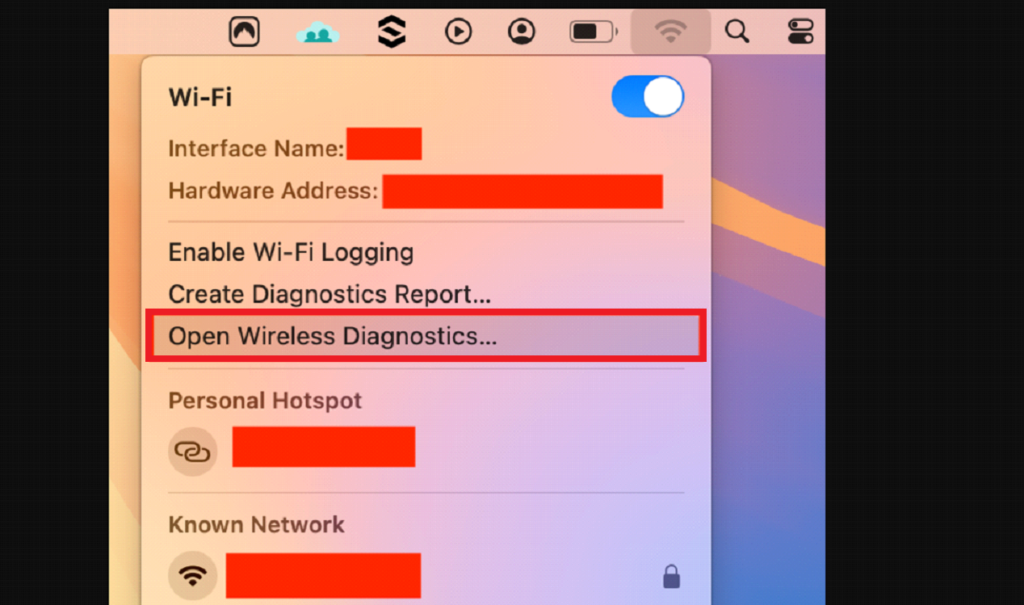
- Once the scan finishes, click the Info icon in the Summary to view any detected issues and recommended solutions.
Switching networks and running diagnostics should help you determine if network connectivity is behind the DNS error, allowing you to address it directly.
#5: Disable Antivirus and Firewall
While antivirus and firewall software play a crucial role in safeguarding your device from online threats, they can sometimes disrupt your internet connection and cause DNS errors. Disabling them temporarily can help you identify if they’re behind the issue.
Here’s how you can disable these tools:
On Windows:
- Open the Start menu and go to Settings.
- Navigate to Update & Security → Windows Security → Firewall & network protection.
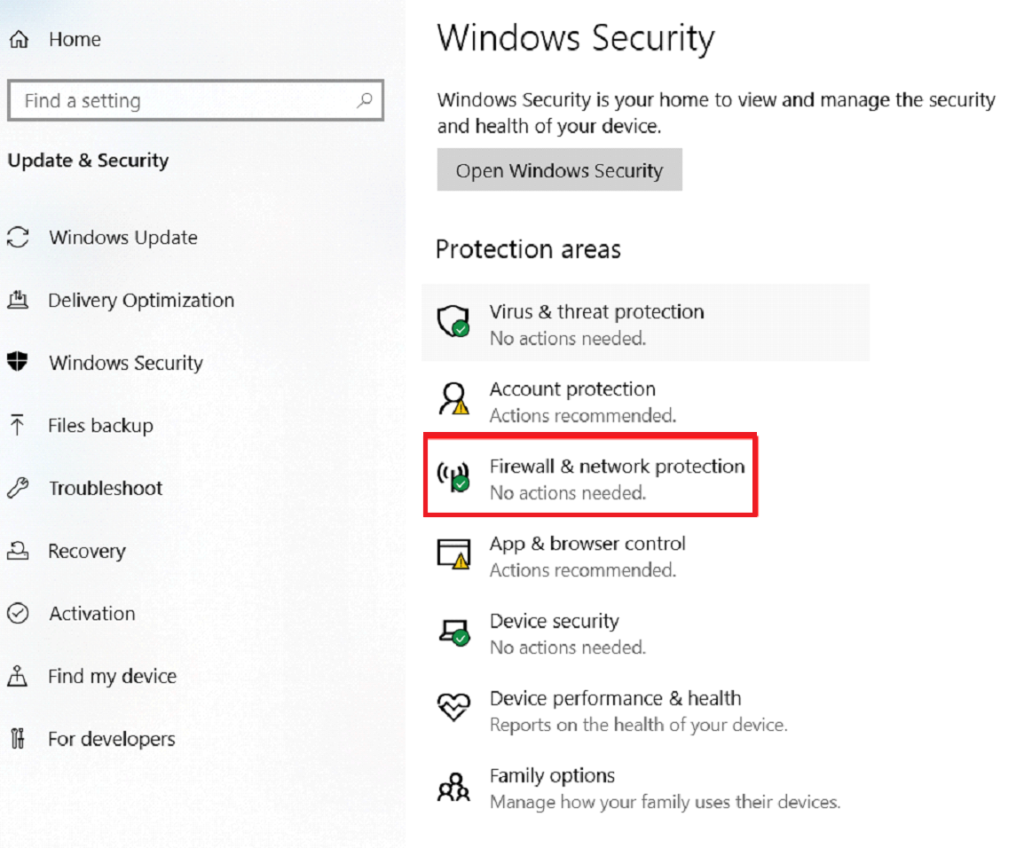
- You’ll see three profiles: domain, private, and public networks. Open each one individually and toggle off the Microsoft Defender Firewall option.
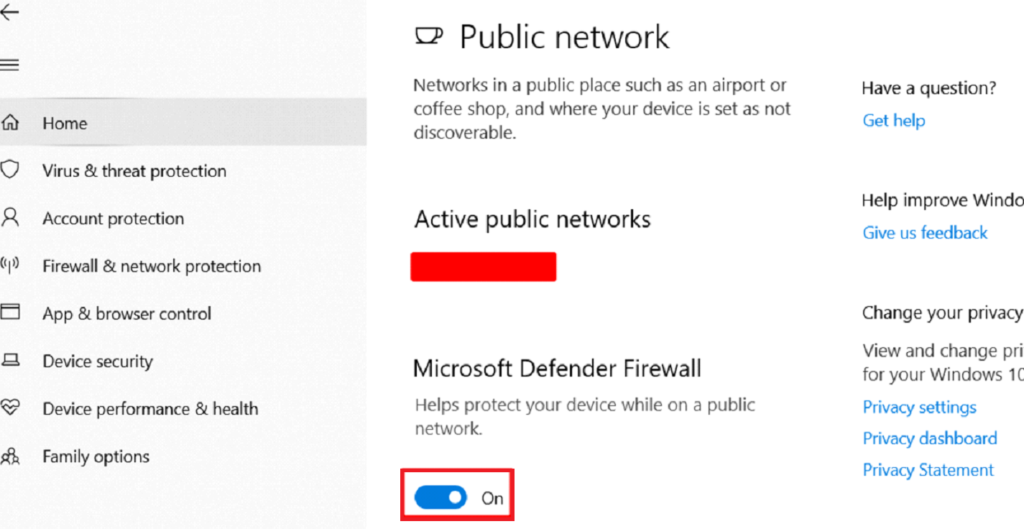
- To disable third-party antivirus software, go to Virus & threat protection in the left-hand menu and deactivate the app from its settings.
On macOS:
- Click the Apple menu and select System Settings → Network.
- Go to Firewall and switch off the toggle to disable the built-in firewall.

- If you’re using third-party antivirus or firewall apps, you’ll need to open each application and manually turn off the protection features.
After disabling these security tools, try accessing your site again. If the DNS error resolves, the antivirus or firewall was likely blocking the connection.
Remember to re-enable them afterward to maintain your device’s protection.
To Sum It Up
The DNS Not Responding error happens when your browser fails to connect with the server hosting your site. This issue can feel frustrating since it restricts access to your website. However, by following a few effective troubleshooting methods, you can quickly resolve it and regain access.
Here’s a quick summary of the five solutions to fix the DNS Server Is Not Responding error in WordPress:
- Switch to a Different Web Browser
- Restart Your PC in Safe Mode
- Clear Your DNS Cache
- Resolve Any Network Issues
- Disable Antivirus and Firewall
Lastly, please let us know in the comments below which solution worked best for fixing the DNS Server Not Responding error on your WordPress site!

![How to Fix DNS Not Responding Error in WordPress [5 Effective Ways] How to Fix DNS Server Not Responding Error in WordPress](https://www.wpdisc.com/wp-content/uploads/2024/11/how-to-fix-dns-server-not-responding-error-in-wordpress-1024x520.png)
![How to Have 2 Lines of Text in WordPress Header [5 Easy Ways] How to Have 2 Lines of Text in WordPress Header [5 Easy Ways]](https://www.wpdisc.com/wp-content/uploads/2025/02/how-to-have-2-lines-of-text-in-wordpress-header-1024x520.png)

![How to Clone My Website to a Second URL [9 Easy Steps] How to Clone My Website to a Second URL [9 Easy Steps]](https://www.wpdisc.com/wp-content/uploads/2025/01/how-to-clone-my-website-to-a-second-url-1024x520.png)
![How to Add Custom Admin Notices in WordPress [Step-by-Step] How to Add Custom Admin Notices in WordPress [Step-by-Step]](https://www.wpdisc.com/wp-content/uploads/2025/01/custom-admin-notices-in-wordpress-1024x520.png)
Leave a Reply